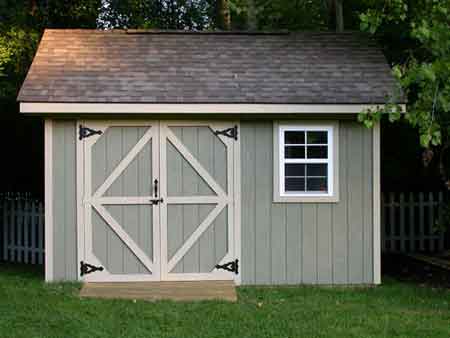
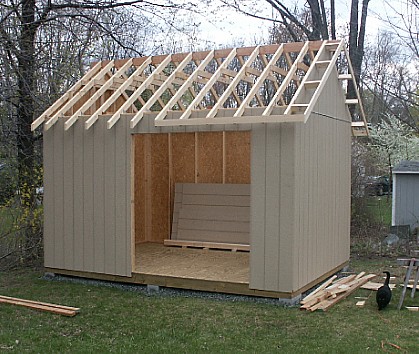
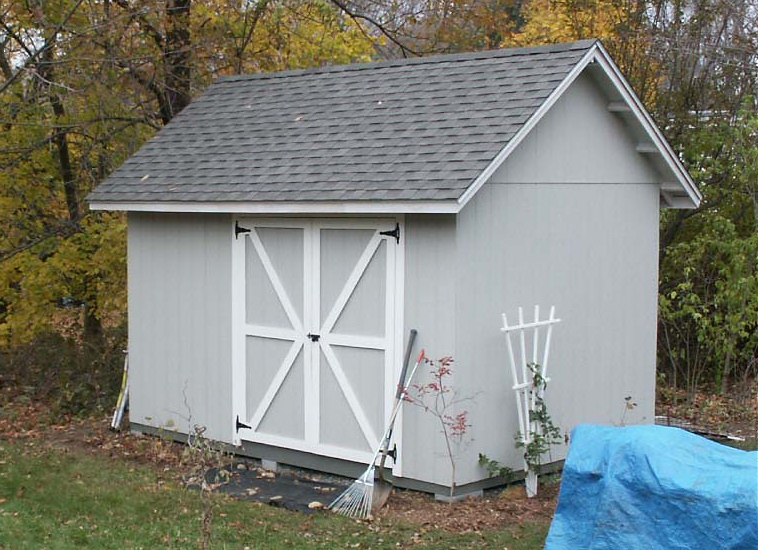
 THIS IS NOT OUR SHED!
.. this picture's from the web site where we got the plans. Ours will look about the same, only better! (or so we intend)
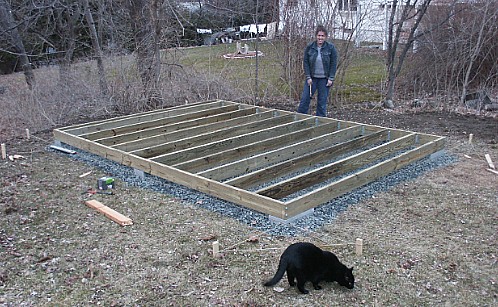
 Sharon is doing ALL the work - well that's what people who
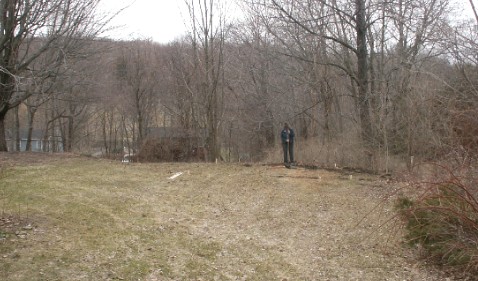
see these pictures will be forced to think. This is the first picture of actual work on the project,
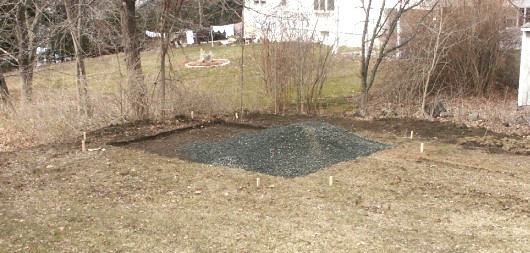
shows the site work just beginning - marked the foundation boundaries.
Sharon is doing ALL the work - well that's what people who
see these pictures will be forced to think. This is the first picture of actual work on the project,
shows the site work just beginning - marked the foundation boundaries.
 "I'm quite disappointed! Ticketmaster sold me this seat and
told me that Shed-Building was an exciting new spectator sport! I don't think so!
Why, they're not even wearing uniforms! And where are the cheerleaders?"
"I'm quite disappointed! Ticketmaster sold me this seat and
told me that Shed-Building was an exciting new spectator sport! I don't think so!
Why, they're not even wearing uniforms! And where are the cheerleaders?"
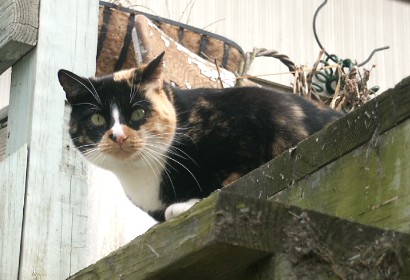
-- Abby, our talking calico.
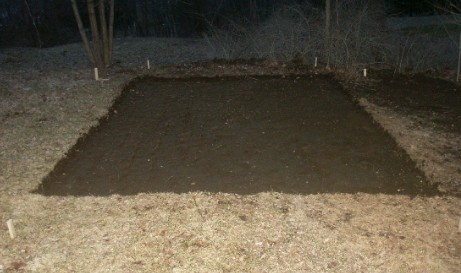 Taken at dusk... the "pit" is ready, dug out to around 4 inches deep,
overall dimensions about 11 ft by 15 ft.
Taken at dusk... the "pit" is ready, dug out to around 4 inches deep,
overall dimensions about 11 ft by 15 ft.
 Three yards of "trap rock" (gravel) has been dumped off ...
 ... so, Sharon has to spread it out - WAIT! She really did do all of the gravel work!
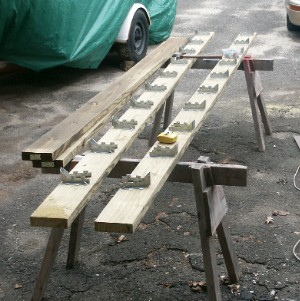 Getting the outer frame boards ready, cut to size, and nailing on the
joist hangers.
Getting the outer frame boards ready, cut to size, and nailing on the
joist hangers.
Overall dimensions of the shed will be 10 ft by 14 ft, and about 8 1/2 ft tall.
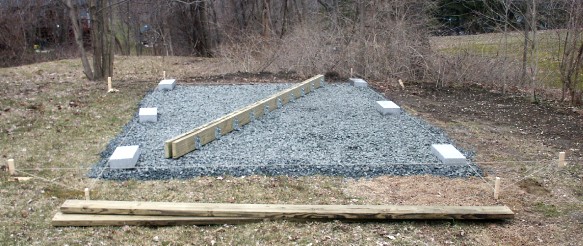 First boards to the site, ready to assemble. Footings are six
8" by 16" by 4" concrete blocks, set into the gravel.
First boards to the site, ready to assemble. Footings are six
8" by 16" by 4" concrete blocks, set into the gravel.
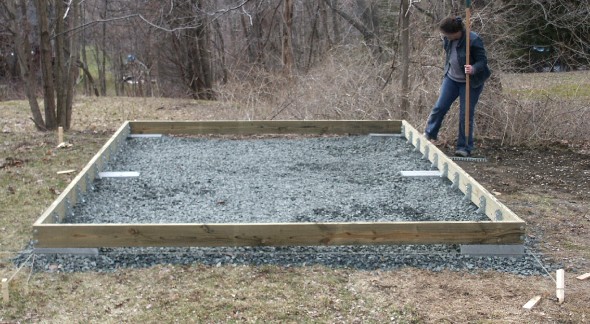 All level and square!
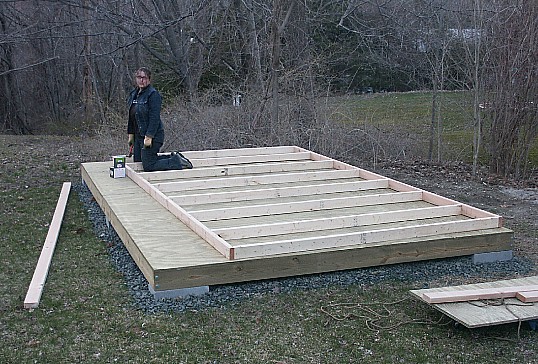
 The floor system joists are all in - ready for the 3/4" plywood decking.
Another Ticketmaster fan (Jimmy) stopped in for a closer look, then wandered off looking confused.
 Next workday, got started framing up the back wall. The 3/4"
plywood decking was all finished and screwed down.
Next workday, got started framing up the back wall. The 3/4"
plywood decking was all finished and screwed down.
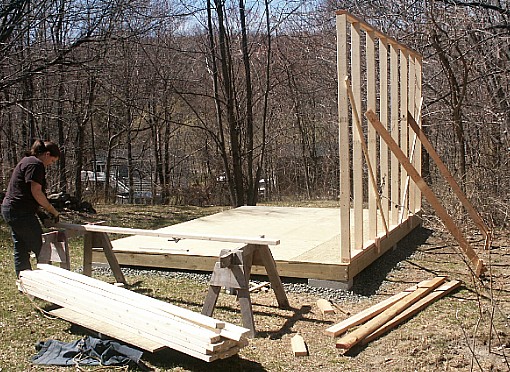 Back wall is up, I think this was the 2nd time. Yes, that's it.
We'd built it about 3 inches too tall the first time, and wound up taking it back down and cutting the
three inches off of each stud board.
Back wall is up, I think this was the 2nd time. Yes, that's it.
We'd built it about 3 inches too tall the first time, and wound up taking it back down and cutting the
three inches off of each stud board.
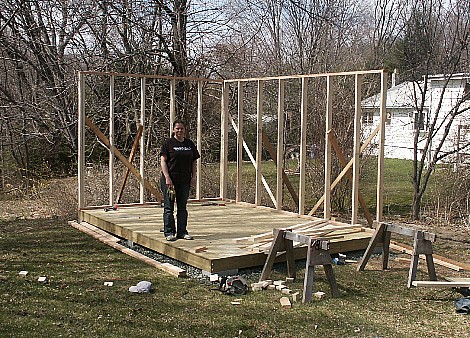 Okay, starting to move a little quicker now. First of the two
side walls is up. Easier things first.
Okay, starting to move a little quicker now. First of the two
side walls is up. Easier things first.
 Then the second. Tougher since it has the window frame assembly.
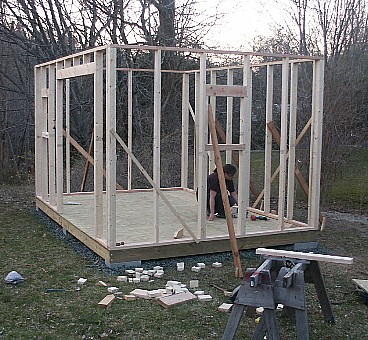 Finally framed up the front wall. Tougher yet, because of the
additional window and the huge door.
Finally framed up the front wall. Tougher yet, because of the
additional window and the huge door.
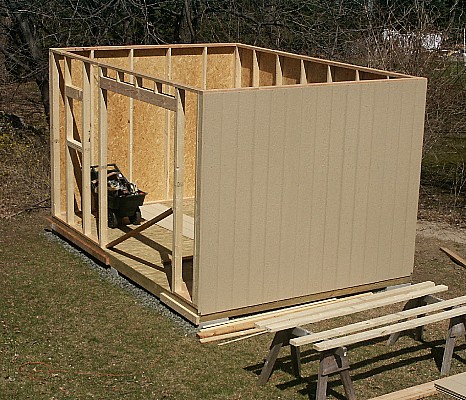 Next workday, we went and bought the siding and the materials
for the roof rafters. That's about all the material that the Chevy Blazer could carry and pull, using
out little Coleman utility trailer.
Next workday, we went and bought the siding and the materials
for the roof rafters. That's about all the material that the Chevy Blazer could carry and pull, using
out little Coleman utility trailer.This photo shows the progress after three walls of the siding has been nailed up. We're leaving the windows unfinished for a while, will come back to those near the end of the project.
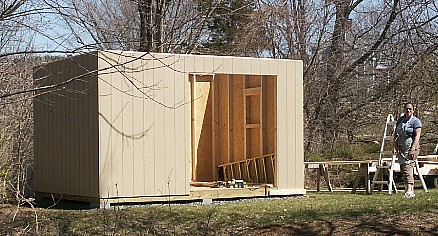 Final wall is sided.
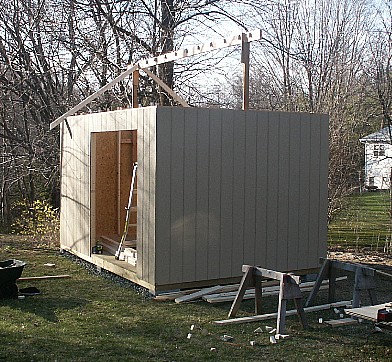 The roof ridge beam is braced in place, and the first pairs of
rafters are being added.
The roof ridge beam is braced in place, and the first pairs of
rafters are being added.
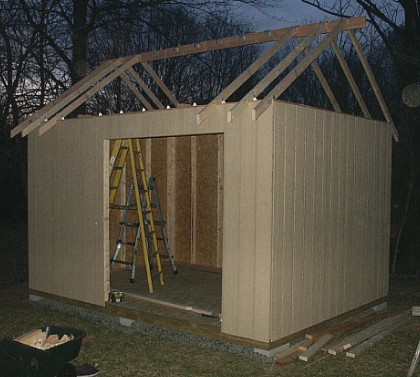 Too dark to work, and it now has to be flash photography.
Still working getting those rafters pairs nailed up.
Too dark to work, and it now has to be flash photography.
Still working getting those rafters pairs nailed up.For scale - that yellow ladder is 8 feet tall! The space inside the shed is way larger than we envisioned, which is good. We'll probably be adding some shelves and a "loft" shelf.
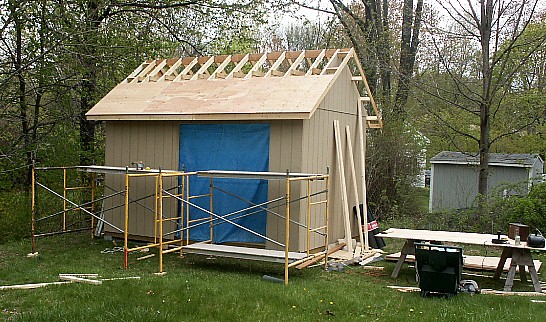
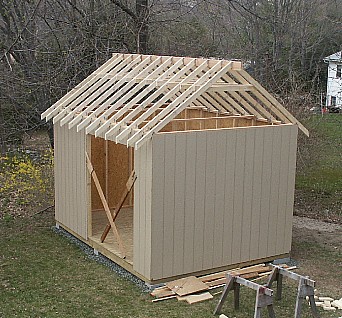 Got the rafters done, along with the 4' cross-braces. Just a
little more framing and paneling to go, then it's time for the roof decking.
Got the rafters done, along with the 4' cross-braces. Just a
little more framing and paneling to go, then it's time for the roof decking.
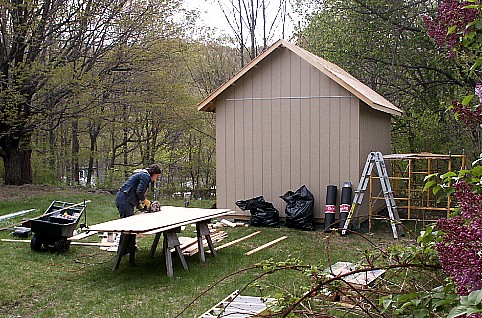
 After a few hours of work during the rain on Saturday, and a
couple of good hours on the windy and cool Sunday, I got the siding (paneling) done. This stuff is very
hard to nail through, so I'm glad it's done. Well, for now. We'll use a little bit more on the doors.
After a few hours of work during the rain on Saturday, and a
couple of good hours on the windy and cool Sunday, I got the siding (paneling) done. This stuff is very
hard to nail through, so I'm glad it's done. Well, for now. We'll use a little bit more on the doors.
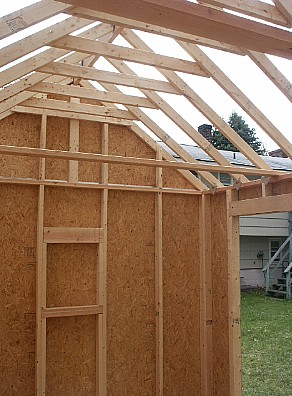 Here's what the frame looks like from the inside.
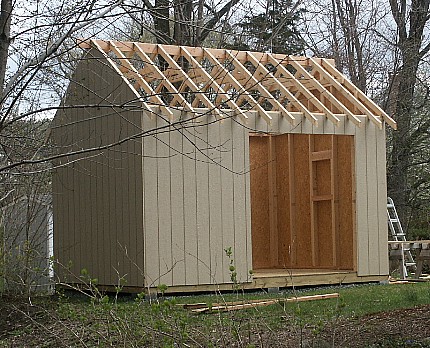
 Later in the afternoon, I finished about a half of the
lookouts and the fascia boards. The lookouts extend the gable ends of the roof. They're rather hard to
install, being way up in the air, and nailed through the end rafters and the siding. Also, I just got tired of
climbing the ladders, and decided to call it day.
Later in the afternoon, I finished about a half of the
lookouts and the fascia boards. The lookouts extend the gable ends of the roof. They're rather hard to
install, being way up in the air, and nailed through the end rafters and the siding. Also, I just got tired of
climbing the ladders, and decided to call it day.
 Here's another one of our cats, the "elegant" ZsaZsa. Quite sociable, but only on her
terms!
Here's another one of our cats, the "elegant" ZsaZsa. Quite sociable, but only on her
terms!
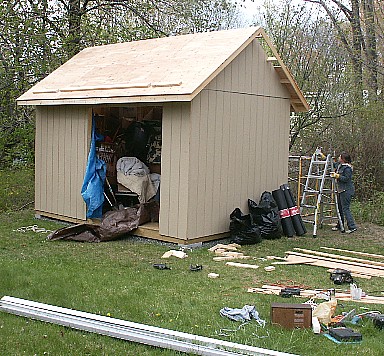
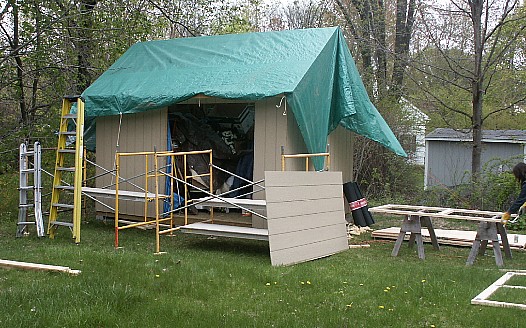 Well, a lot has changed since the last photos, huh?
First off, the things that were brought back from Texas have been loaded inside the shed. But, since there was no ROOF, we tied a big tarp over the rafters so things wouldn't get wet before we had a chance to finish the "real" roof. Lots going on in this photo - you can see our rented scaffolding, some door frames being built, rolls of roofing felt, sheets of plywood. A big mess!
 About one-fourth of the roof plywood has been nailed up.
While I nailed the plywood up, Sharon would cut the next piece.
About one-fourth of the roof plywood has been nailed up.
While I nailed the plywood up, Sharon would cut the next piece.
 This was the next day, really. We'd finished the first side,
then moved to the "back" of the shed to finish the fascia boards, and continue with the plywood roof sheathing.
About 3/4 of it's done by this photo. Sharon's using the circular saw, while Doug takes pictures! Hee hee hee!
This was the next day, really. We'd finished the first side,
then moved to the "back" of the shed to finish the fascia boards, and continue with the plywood roof sheathing.
About 3/4 of it's done by this photo. Sharon's using the circular saw, while Doug takes pictures! Hee hee hee!
 Told you it was a mess! Plywood work still going on here. You can see the
toe boards that I nailed up to be able to reach the upper half of the roof.
Told you it was a mess! Plywood work still going on here. You can see the
toe boards that I nailed up to be able to reach the upper half of the roof.
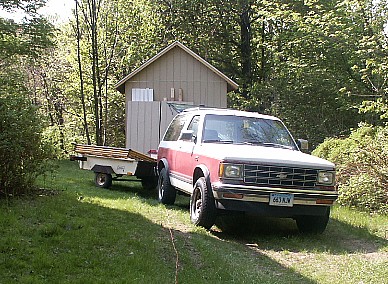 Okay, I didn't really take ANY pictures while we were putting up
the shingles. Must have been in a hurry. Here's a picture of the Blazer towing our Coleman "VersaTrailer",
loaded up with the scaffolding to be returned to the rental center. That's because ...
Okay, I didn't really take ANY pictures while we were putting up
the shingles. Must have been in a hurry. Here's a picture of the Blazer towing our Coleman "VersaTrailer",
loaded up with the scaffolding to be returned to the rental center. That's because ...
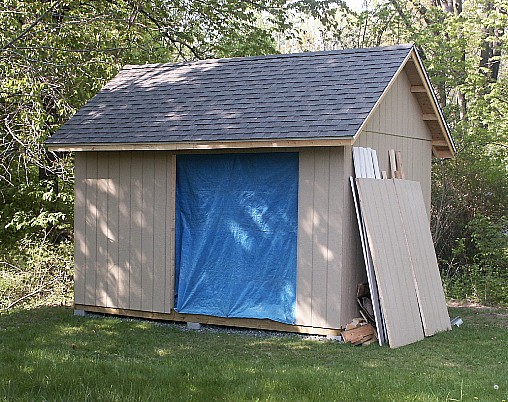 The roof is done! Yay!
You can see the metal drip edges around the perimeter of the roof, and the two kinds of shingles - one kind for the flat areas, and another kind for the roof ridge. Underneath the shingles there's a complete covering of roof felt. Sharon chose the roofing materials, and eventually our house will have the same shingles - since we're due for a roof overhaul there within a year or two.
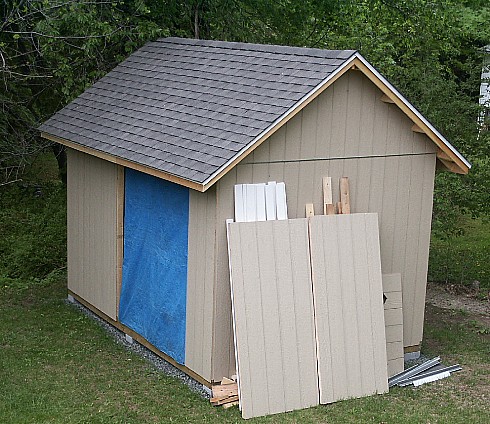 A different angle - this is how the shed looks from our master bedroom
window. Those are the doors leaning up on the east wall of the shed, along with assorted parts and some spare
materials.
A different angle - this is how the shed looks from our master bedroom
window. Those are the doors leaning up on the east wall of the shed, along with assorted parts and some spare
materials.
 Painted, plants added. The wood for the ramp is under the tarp the right.
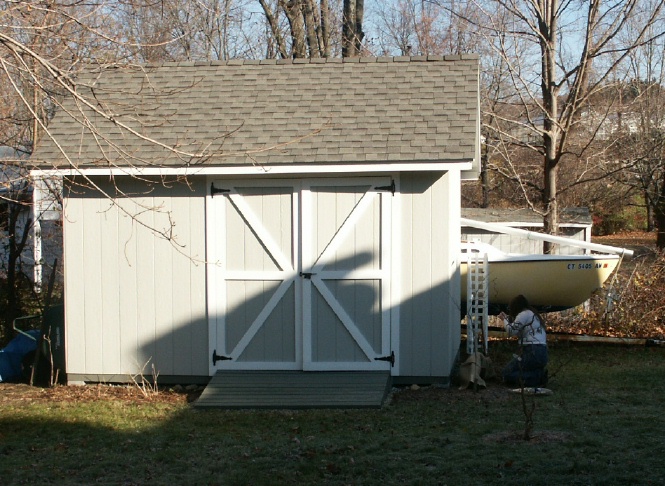 November 19, 2005 - Painting even more done, ramp is installed. Looks like it will be next
spring before we add the windows and final trim boards. But it looks great so far! We added some hardware to
the doors to help them close better, and to not swing open so far, there are now some plants that would be damaged.
November 19, 2005 - Painting even more done, ramp is installed. Looks like it will be next
spring before we add the windows and final trim boards. But it looks great so far! We added some hardware to
the doors to help them close better, and to not swing open so far, there are now some plants that would be damaged.